Dating with Drawer Joints

grey dresser#4

My post about this dresser could be about many things but I will focus on the drawer joints.  First, the age of the piece:  it’s maple, looks hand-made and it has pin and cove joints.  Pin and cove joints or Knapp joints were used during a very short window of time, between 1870 and 1900.  They were an upgrade in terms of ease from the hand-cut joints that were used earlier because they were created with a machine that had been invented by Charles Knapp.  Apparently, inventors had been unsuccessfully trying to perfect a machine-made dovetail but Knapp solved the problem by creating a new type of dovetail altogether.  The joints are seen exclusively on the furniture from 1870-1900 ( Victorian and Eastlake styles) but fell out of fashion with the Colonial Revival trend and the fact that newer machines were finally able to imitate the traditional dovetail.  So, these joints( also known as half-moon), used almost solely in North America, are a reliable way to date a piece.  Here’s what they look like:

grey dresser #1

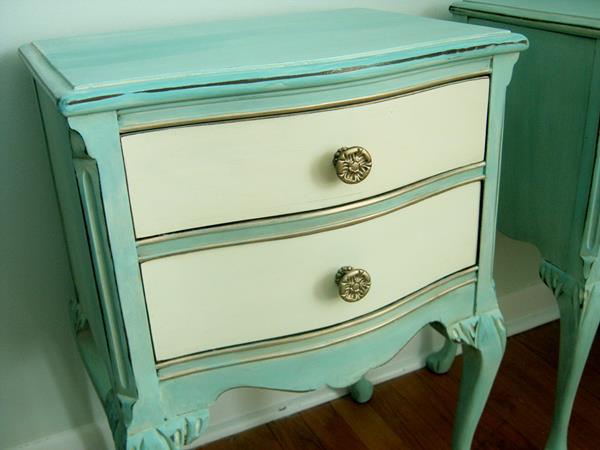
I painted the dresser with General Finishes “Driftwood” milk paint then applied a white wash with chalk paint.  It’s my first time using this paint and although it isn’t a true milk paint because it has acrylic in it, it does create a nice opaque finish and is easy to work with.  I did like how the paint revealed the grain of the wood, something I didn’t expect.

grey dresser #2

This dresser did present me with one problem, in that it had a very musty odour when I bought it.  I cleaned it out and painted the entire inside with clear shellac.  Shellac will seal an odour in and is a very effective tool.  However, the shellac  odour lingered for days inside the drawers.  It is a sweet, alcohol smell and it shouldn’t have been present since the alcohol in the shellac usually dissipates quickly when exposed to the air.  I could find no explanation for this when I did some research.  There’s always something with an old piece of furniture.

grey dresser#3

.

http://missmustardseed.com/2015/05/furniture-feature-friday-favorites-link-party-64/

Best DIY Projects and Recipes Party

http://www.findingsilverpennies.com/2015/05/silver-pennies-sundays-link-party-and-features-122.html

http://www.elizabethandcovintage.com/

All That Glitters

Touches of gold, silver and copper are very popular today but there are different uses for gold paint, gilding wax/ paste and gilding sheets.  Gold paint, whether it is spray on or brushed, provides uniform coverage.  It is perfect for handles, mason jars and mirrors, if the look you want is very even.  These mason jars from Mason Jar Love illustrate what I meangold-painted-mason-jars-3_thumb-480x665

Gilding wax or paste is something that I have used a lot on furniture.  You apply it with your finger or a brush to the edge or moldings on a piece.  It is not as uniform as paint and provides a hand-painted look to something.  There are a few varieties available but I have used mostly Baroque Art.  It will adhere to most surfaces and cures when it hardens.  The only downside is that you can’t put anything over it such as poly and regular wax will soften it and remove the paste because it has solvents.  I use it all the time to change the colour of brass handles which I am not fond of.  This first photo shows copper paste that was applied to brass handles.  The copper is a nice complement to the mahogany top.IMG_0605

I often play with paint and gilding paste on handles to give them a more unique look as in these brass handles which I painted pink and put silver tips on.

DSC_0017(2)

These other photos are of furniture that I have used the wax on in a more traditional way such as on the edges of the pieces.

IMG_0436

Mahogany End tables.

Gilding sheets are thin pieces of gold foil that you apply to brushed-on glue.  They are lovely because they provide that broken, not quite perfect look, that you see in gold leaf applications. But, they are tricky to work with and would be difficult to apply to furniture.   A  plus is that they can have a protective coating applied to them like water-based Varathane or Krylon spray.  I used them on these chalk painted clay pots and really like the effect.  I got the idea for the broken random pattern from The 36th Avenue

DSC_0001(37)

DSC_0006(23)

DSC_0003(36)

DSC_0004(38)

DSC_0005(28)

This last pot is a large clay pot that I had lying around.  Parts of it have been broken and crumbled on the side.  I painted the pot with Tuscan Red milk paint from General Finishes, then added bluish dry-brushed chalk paint.  The edge has gilding paper.  The whole effect is of rusted metal.

rusted potrusted pot 2

I would never have been able to achieve that look with paint or paste.  Gilding sheets also look lovely on the inside of a tray or bowl.  So, the 3 applications have different looks and purposes and are fun to experiment with.

http://missmustardseed.com/2015/05/furniture-feature-friday-favorites-link-party-67/

http://www.thepainteddrawer.com/2015/05/the-painted-drawer-inspiration-link-party-5.html?utm_source=feedburner&utm_medium=email&utm_campaign=Feed:%20ThePaintedDrawer%20%28The%20Painted%20Drawer%29

http://www.findingsilverpennies.com/2015/05/silver-pennies-sundays-link-party-and-features-119.html

http://www.thededicatedhouse.com/

http://www.elizabethandcovintage.com/

http://ladybug-blessings.com/